iSpindel Tips and Lessons Learned
For an overview of what an iSpindle is and links to very useful resources, see the main iSpindle page!
I thought it might me helpful to jot down a few thoughts about our collective experience of constructing the iSpindle as demonstrated on the OpenSourceDistilling website. Joey Joe Joe Jr. does a great job of simplifying the process but, judging by his soldering technique, it’s fairly obvious that he’s done a few electronic projects in the past whereas I have not. So, with that in mind, following is a list of things Jesse and Mike stupidly did and cleverly figured out that might help you with our project.
Also, keep in mind that if you are an experienced ‘solderer’, these tips might seem pretty silly and obvious but if someone had told them to me, it might have saved me some frustration. If you have some experience soldering and would like to share some of your knowledge, please reach out in the comments and drop some knowledge bombs on us. And I mean that sincerely. Watching YouTube videos is a great start, but all of those folks make it look very simple and I can see people getting frustrated by the difficulty of it.
Equipment
- Soldering iron – If you don’t have one, I found this one on amazon for $8.88.
Based on what I had been told and had seen on YouTube, getting an iron that has temperature control is important and this one does. It worked surprisingly well for the price and came as a kit with some other tools that turned out to be very useful as well. It, unfortunately, does not have an on/off switch, so remember to unplug it when you’re done. - Solder – The kit above comes with some solder, but I was having trouble with it melting/flowing at times. I don’t know if I had the iron too hot, too cold, or if I’m just terrible at this, but the bottom line is: I was having issues. A friend of mine loaned me some of the solder linked above and I had the best results with that. It melted when I wanted it to and flowed evenly. It was a smidge thicker than the solder in the kit, so I’m assuming that had something to do with it, but maybe it’s the composition of it?
- Solder wick and flux – I made a pretty egregious mistake on my first attempt and have been trying to correct it for a few days (i.e. I’ve been trying to remove a component that I soldered onto the PCB the wrong way). Judging by what I’ve been reading and seeing on YouTube, using a wick and some extra flux would have made a world of difference, I’m hoping it may still. I’m not necessarily endorsing the linked products, by the way, but those seemed to be good representations. I would recommend doing some research.
- These components are tiny and if you’re a “more experienced” brewer (read: north of 45 or 50), I HIGHLY recommend having some strong reading glasses, a hands-free magnifying glass or some other way to see what the heck you’re doing. Pro tip: if you wear two pair of reading glasses at one time, the magnification property is compounded. It looks stupid, but, as they say, if it works, it ain’t stupid.
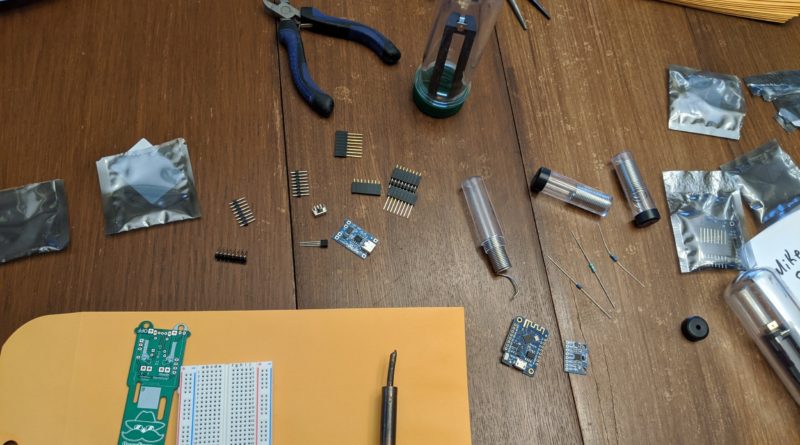
- Breadboard – You’ll notice in the video, he uses a breadboard to position and hold the headers while he solders them to the PCB. I thought that it might be a good idea to do the same and ordered a few small breadboards from Amazon. Definitely worth the few dollars, I think. I can’t imagine trying to hold the headers, the PCB and solder at the same time.
Technique and other tips
- Watch the Open Source Distilling assembly video a few times before you start. He does a good job of explaining the assembly, but he does go pretty quickly and it’s easy to get the orientation of the PCB or module being worked on mixed up. Then, after a few views, follow along to the video as you’re assembling. Obviously, have the ability to pause and rewind the video as needed.
- Know what all the parts are and what they do. I had the advantage of researching, ordering and compiling all of the bits and pieces into kits so I knew the D1 mini vs. the charging module vs. the gyro module, etc. which made the assembly go just a bit smoother. This is helpful for when you follow along to the video as well.
- There are a ton of “How to Solder” videos on YouTube. Just sayin’.
- My father-in-law is a retired Electrical Engineer so he has many, many years of soldering experience. The most useful thing he told me was that you want to put the iron on the board and the header (wire) to heat them both then melt the solder.
- I’ll state the obvious one as well – Take your time.
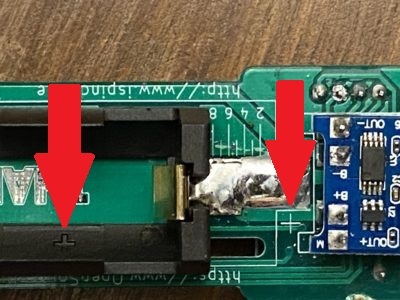
- One thing I failed to notice was that the PCB is marked for the polarity of the battery. Unfortunately, I think I noticed it AFTER I fried a charging module. Notice the “+” marking in the photo (and kindly ignore the terrible soldering):
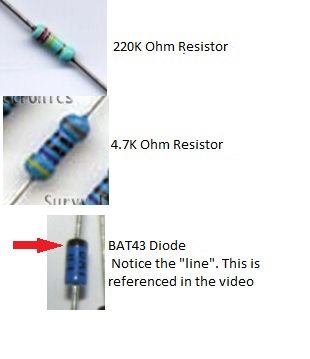
Notice that the 220K Ohm resistor is a lighter blue than the 4.7K Ohm resistor. Also, the diode is directional. The correct direction is noted on the PCB.
UPDATE (2/28/21):
Note that if you ordered a kit that arrived in early 2021, the 220K resistors look different than those received in the previous order.
Refer to the below photos.
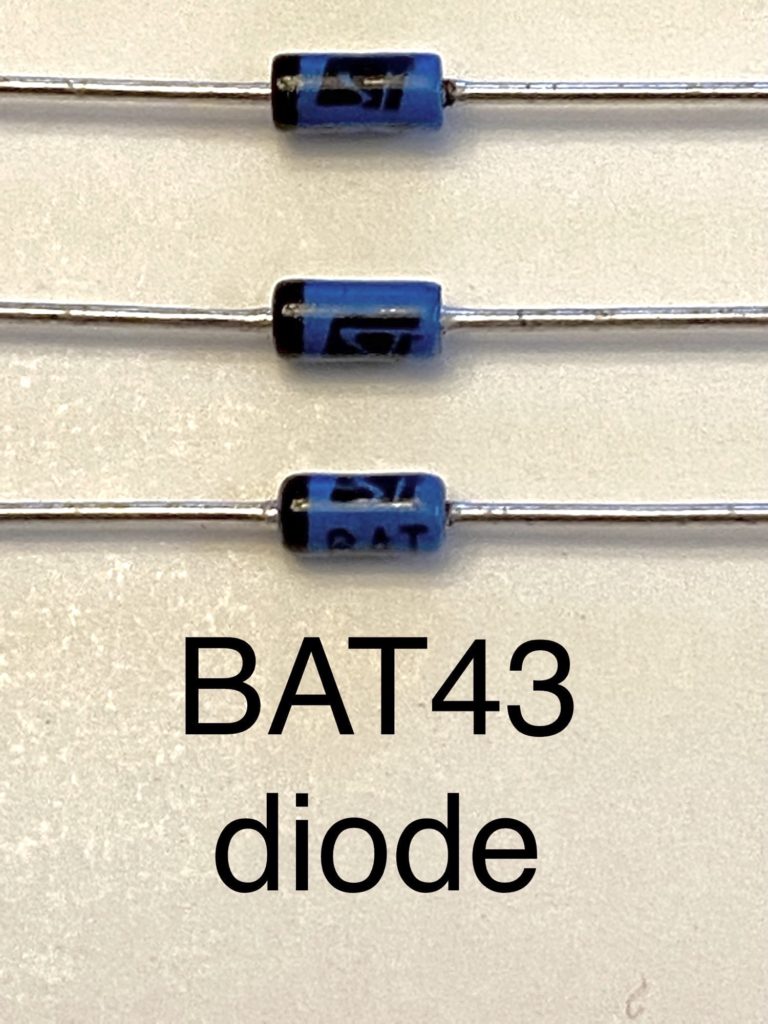
BAT43 diode 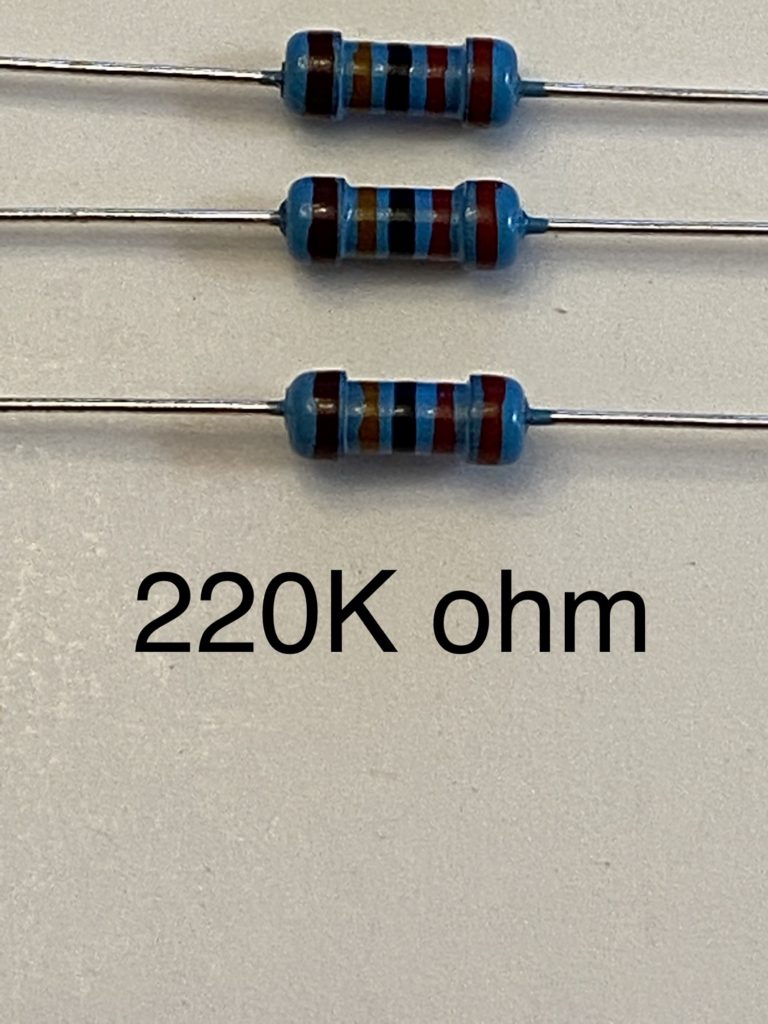
220K ohm resistor 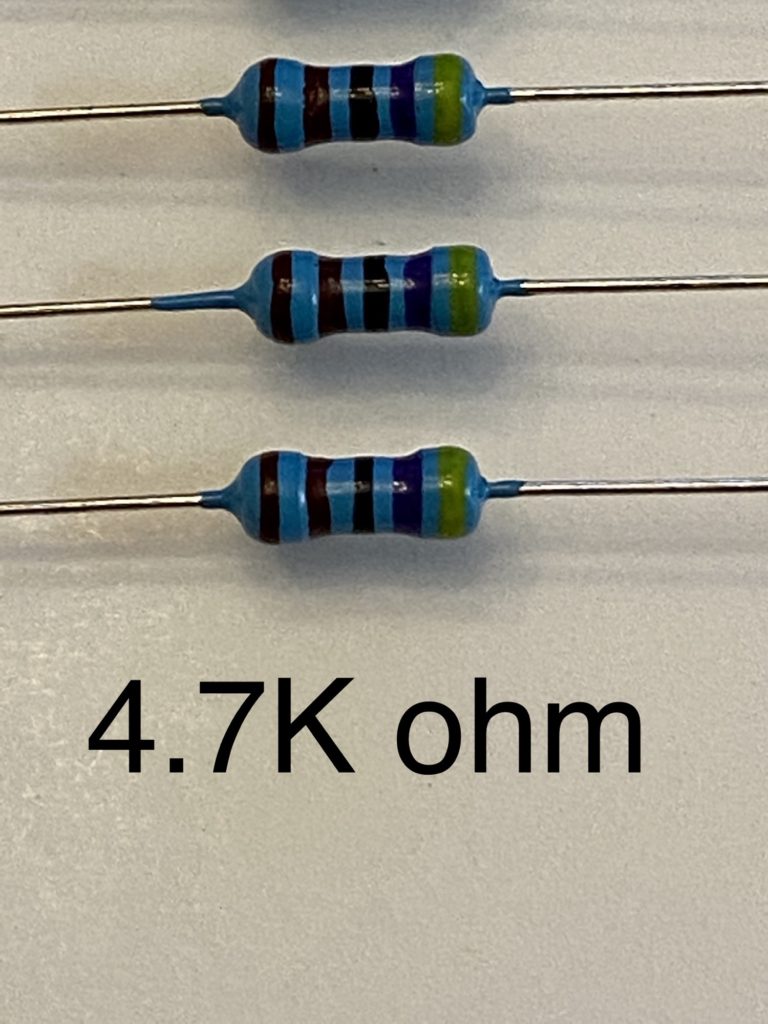
4.7K ohm resistor
Calibration
Once the iSpindle is working (you’re able to connect to its wifi and you can open the iSpindel Info page) you have to calibrate it to float at 25° in pure water. There are several videos available that discuss the process, so I won’t rehash that here. The basic idea, though, is to get the center of gravity of the device located in such a way so that it floats at as close to 25° as possible. I’ve heard that +/- 5° will still allow for a good calibration. You can accomplish this by moving the battery up or down in the petling or adding weight to the bottom of the PCB.
In my case, for example, the angle was too high (about 40°, I believe). In order to get the angle to 25°, I had to get the battery further down the petling by filing down the bottom of the PCB as much as possible.
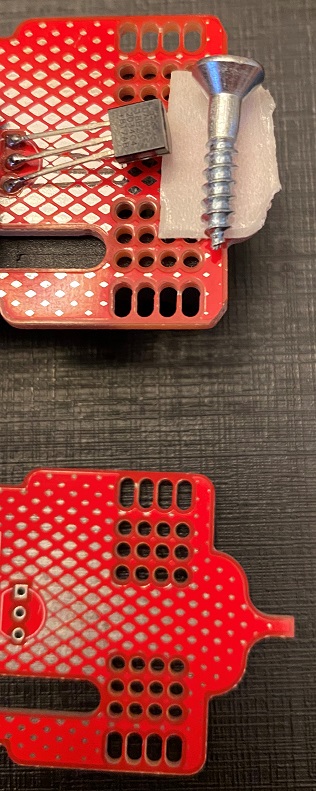
In my case, for example, the angle was too high (about 40°, I believe). In order to get the angle to 25°, I had to get the battery further down the petling by filing down the bottom of the PCB as much as possible.
I also had to add a little bit of weight to dial it in. I accomplished this by attaching a small screw to the end of the PCB with some double-sided tape (actually, a small piece of a Command Strip)
Once the device is floating at 25°, it’s time to get this device’s angle in water related to an actual specific gravity or Plato reading. Again, there are some very good instructions and videos on the exact process to accomplish this so I won’t go into detail here. However, the gist is that you start by making a sugar wash with a specific gravity of the highest beer you’re likely to brew, note the tilt angel, dilute the wash to bring the gravity down 10 points, and repeat. In my case, I shot for an SG of 1.090 (around the SG of a stout) to start. These values are entered into a spreadsheet or, as I did, into this online calculator. There is an option to do a fast ferment to get a very accurate calibration, but, of course, that will take more time.
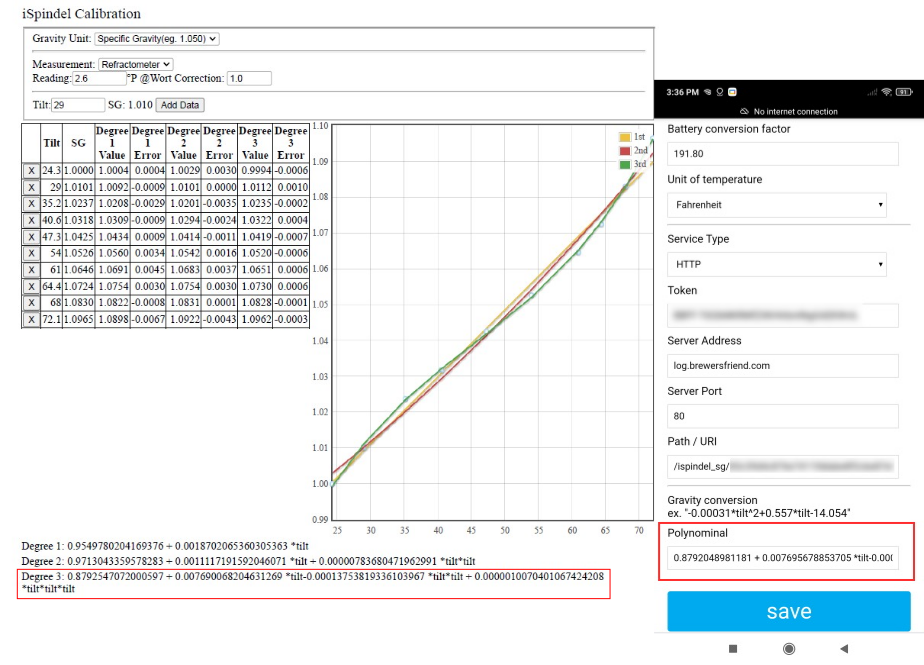
The goal of this is to generate a polynomial that you can put into the iSpindel configuration that will allow it to spit out a recognizable specific gravity reading.
One important thing to note: The iSpindel polynomial text box in the Configuration page has a character limit of 100.
If you enter the whole string, it will replace the final “*tilt”s with numbers and you will get some very odd readings.
There are a few strategies that you can use to reduce the number of characters of the generated polynimoal:
- Try removing some of the spaces put in there by the calculator
- Use an exponent shorthand to abbreviate “*tilt”. For example, “*tilt *tilt *tilt” would become “*tilt^3”
- Take a few digits from the back of each of the numbers to bring the total length down to under 100 characters.
Take my Degree 3 polynomial for example. I went from 124 characters:
0.8792048981181804 + 0.007695678853705874 *tilt-0.0001376956760855548 *tilt*tilt + 0.0000010082686210055175 *tilt*tilt*tilt
to 98:
0.8792048981181 + 0.007695678853705*tilt-0.0001376956760855*tilt^2 + 0.0000010082686210055*tilt^3More information
- Be sure to search for “iSpindel“, not “iSpindle” (like I did). Correctly spelling the project name returned many more results
Mike reminded me that this project is of German origin and they spell “spindle” slightly differently than we English speakers do. German = “spindel” English = “spindle“. - Refer to our main iSpindel page for links to useful resources.